
Step-by-Step PET Strapping Guide: Made Easy Through Pneumatic Baler Tools
2025-11-21PET strapping your loads has never been simpler. This step-by-step guide shows you how to use PET straps with pneumatic baler tools and packing pliers for secure, stable, and professional packaging. You do not have to be an expert in packaging or handling heavy-duty loads; these instructions will take you to the ideal tension with every application.
What is PET Strapping and Why Use It
PET strapping, or polyester packing strap, is a strong and resilient material used widely in logistics, ceramics, electronics, and hardware industries. Prominent advantages are:
-
Tensile strength: Stays under tension for long durations.
-
Impact resistance: Provides secure transportation of goods over long distances.
-
Safety handling: Smooth edges provide safe handling without harm.
-
Rust-free: Compared to steel strapping, PET will not rust or damage your products.
Weide Chuangyi Packaging offers excellent PET straps from virgin polyester in standard sizes of 1508, 1608, 1609, and 1910 for loads ranging from medium to heavy. Specialized colors and lengths are also available.
Tools You’ll Need for the Job
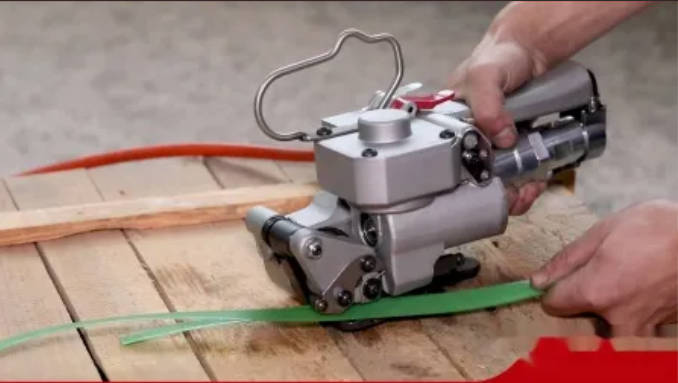
Pneumatic Baler
Our pneumatic baler supports strap widths between 13–25mm and strap thicknesses from 0.4–1.5mm. It friction-welds the strap ends firmly without using metal clips. Operating air pressure is from 0.5–0.8MPa, ideal for high-speed industrial use.
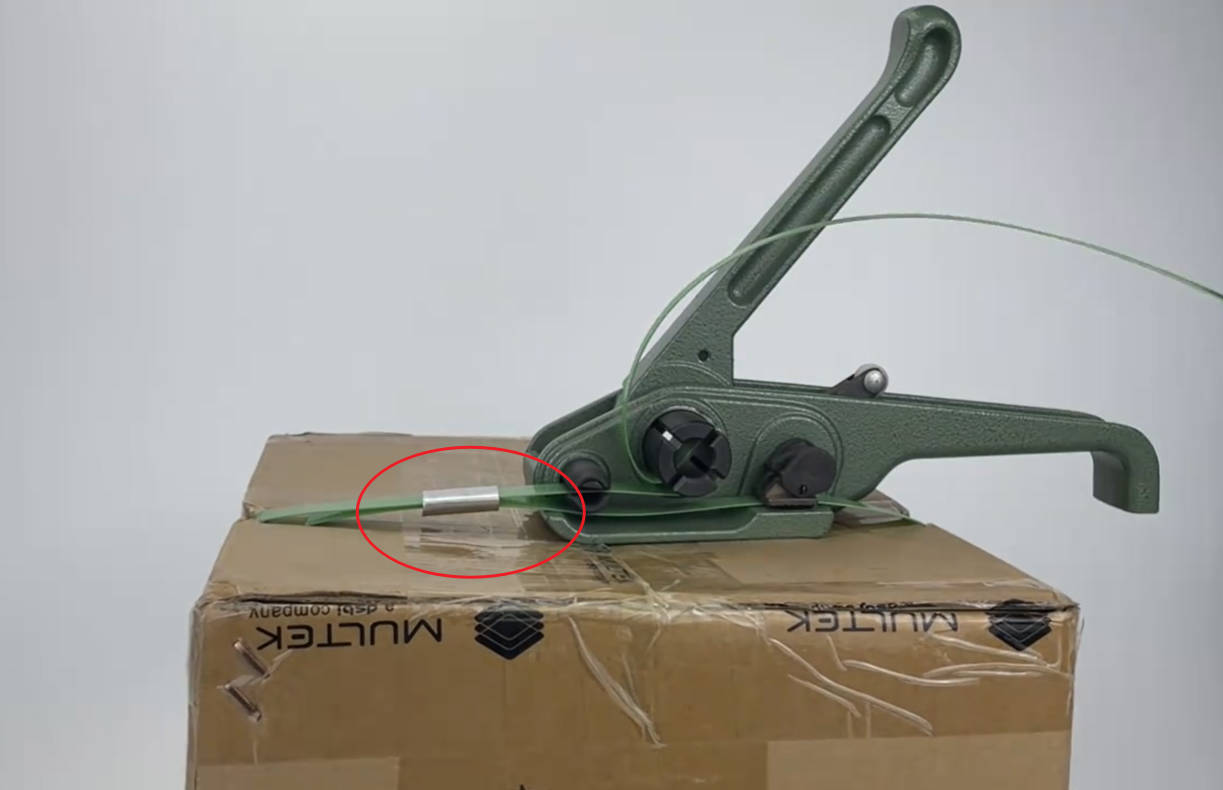
Steel Seals and Packing Pliers
Galvanized steel steel buckles (dimensions: 16mm×0.5mm or 19mm×0.8mm) are utilized in conjunction with packing pliers (or Poly Strapping Sealers). They help in holding overlapping strap ends tightly when they have to be sealed manually.
Choosing the Right PET Strap Size
| Load Type | Strap Size | Width |
| Medium Load | 1508 | 15mm |
| Heavy Load | 1609/1910 | 16–19mm |
Step-by-Step Instructions
Step1. Arranging your workspace
An organized workspace reduces errors:
-
Place your product on a stable surface.
-
Ensure you have enough room around the item to work with straps and tools.
-
Position all tools within easy reach.
Step2. Learning how to load the PET strap onto the baler tool
Loading the strap:
-
Place one end of the PET strap into the lower feeding slot.
-
Walk it through until it emerges from the back.
-
Do the same with the top layer into the top feed slot.
Make sure both ends overlap correctly at the sealing area.
Step3. Product positioning for strapping
Wrap the PET strap around your product horizontally or vertically based on stability needs. Make sure tension is evenly distributed by positioning straps symmetrically along corners or edges.
Step4. Steel seal clamping
Proper positioning of the steel seal
Place a galvanized steel buckle across both ends of overlapping layers of PET strap at the point where they meet on top of your package. Simply slide the split clamp over overlapping strap ends before or following tensioning and crimping into place with a hand tool.
Use Packing Pliers to Clamp
-
Clamp using Packing Pliers
-
Open plier jaws wide enough to slide over the buckle.
-
Hold buckle teeth on opposite sides.
-
Press handles firmly to secure the buckle in place.
Tip: Make sure the buckle lies flat and is in alignment; incorrectly aligned seals may fail while in transit.
Step5. Tensioning PET Strap
Strapping alignment by tool
After clamping:
-
Put both ends into their slots within your pneumatic baler.
-
Ensure they lie flat and are in alignment without overlaps or twists inside.
Tension activation with pneumatic baler
-
Pull down on the lever or trigger.
-
Friction welding produces heat, sealing the strap ends without metal clips.
Testing for correct tightness
After tensioning
-
The strap must be tight but not cutting into your product.
-
No slack between layers.
-
Rock back and forth with manual tools until the desired tightness is achieved before closing.
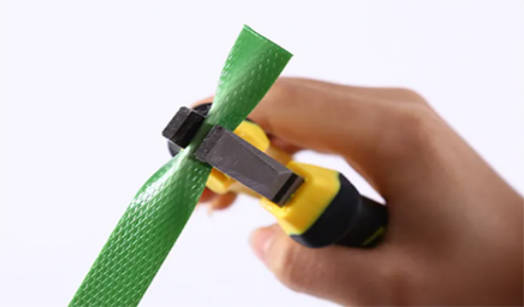
Step6. Cutting and Finishing the Strap
With the cutter integrated into it
Most pneumatic balers incorporate a cutter blade built into them that cuts off excess strap once sealing has been accomplished. Once the buckle is tightened, hold the strapping band in your left hand and quickly press down on the lever with your right hand to cut the band. Where manual tools are employed, there is usually a clearly defined cutting frame mounted near tensioner handles.
Ensuring clean and safe completion
Always ensure:
-
No sharp edges protrude from sealed surfaces.
-
Shave cut ends close to buckles.
-
Dispose of scrap pieces at the time to avoid further injury risks.
Preventable Common Errors
Loose clamping or seal misalignment
Mis-clamped buckles may lead to failure in transit. Ensure full engagement of plier teeth and seal surface prior to exerting firm pressure.
Over-tensioning or under-tensioning
Too much force will destroy fragile items; too little force keeps packages in a precarious state during transit. Adjust air pressure controls for load type while using pneumatic balers.
Improper strap location
Avoid placing straps along edges where they might slide off during handling—especially when materials have no sharp edges, like cylinders or bags.
Long-Term Use Maintenance Tips
Cleaning your pneumatic baler tool
Regularly wipe down external surfaces using dry cloths; avoid water near electrical components if using electric versions instead of pneumatic ones. Lubricate moving parts monthly, depending on usage frequency.
Inspecting parts regularly
Check wear-and-tear signs on:
-
Cutter blades
-
Friction weld pads
-
Air hose connectors
Replace damaged parts immediately using original replacements only from Weide Chuangyi Packaging channels.
Proper storage of tools
Store all equipment in dry areas away from exposure to dust when not being utilized; neatly hang hand tools on wall hooks whenever possible for quick pick-up next time around!
FAQ
Q: How do I choose the correct PET strap size for my load?
A: Select the strap based on the load weight: use 1508 (15mm × 0.8mm) for middleweight loads, and 1609 or 1910 (16–19mm × 0.9–1.0mm) for heavy loads to ensure safe packaging.
Q: Are pneumatic balers for use with both PP and PET straps?
A: Yes, most Weide Chuangyi Packaging pneumatic balers are compatible for use with both PET and PP strapping tapes, allowing for flexibility to meet different packaging needs.
Q: How do I ensure PET straps remain tight in transit?
A: It’s a matter of tensioning properly. Store straps flat, don’t twist, press seals tightly with packing pliers, and adjust baler air pressure to avoid over- or under-tightening.
Q: What safety precautions should I take when using a pneumatic baler?
A: Always wear gloves and goggles, maintain a clean working surface, ensure tools are in good condition, and never face the baler towards you or anyone else.
Q: How do I maintain my pneumatic baler so that it can be used continually?
A: Clean and inspect the tool regularly, lubricate moving parts monthly, inspect for wear on cutter blades and weld pads, and store in a clean, dust-free area.